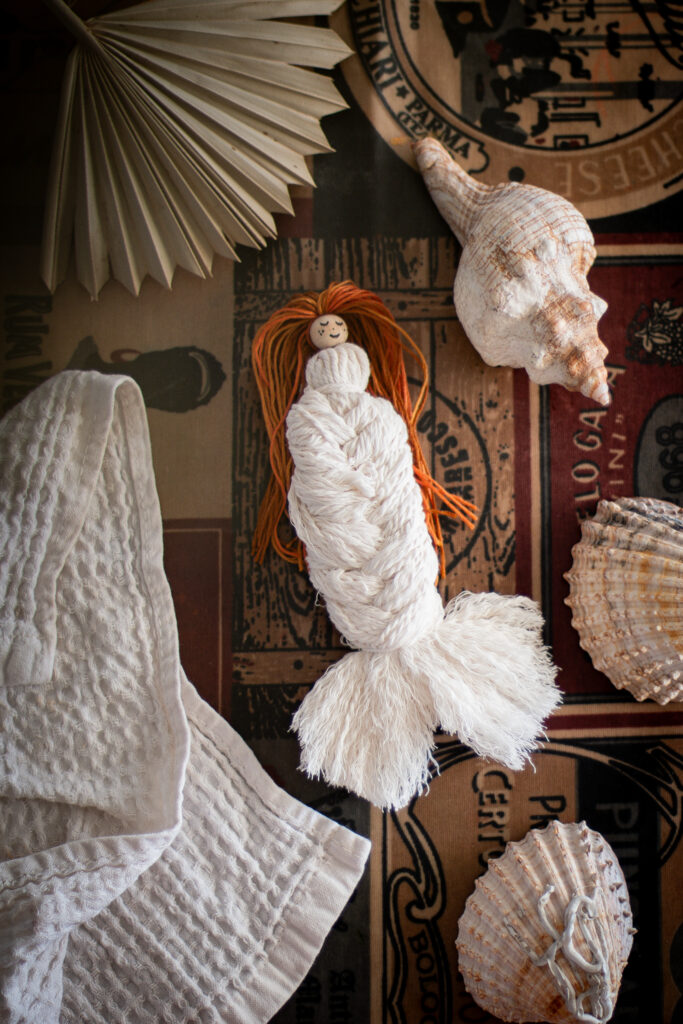
Creating handmade crafts not only sparks creativity but also brings a sense of accomplishment. In this blog post, we’ll explore the magical world of DIY macramé mermaid dolls. With just wooden pearls, yarn scraps, and a sprinkle of imagination, you and your child can embark on a journey to craft charming mermaids using the art of macramé and tassels. Don’t worry you don’t need to be a professional macramé creator to do these dolls!

Materials Needed:
1. Wooden pearls in various sizes
2. Yarn scraps in a variety of colors
3. Scissors
4. Comb or brush
5. Small beads (optional)
6. Glue (optional)
7. Thin rope or twine
I am not a macrame pro, but you can find another macrame project that I tried a few years ago here, really easy as well. You can create keychains, wall suspensions, and other arrangements with these macrame feathers !
Step-by-step Guide
1. **Preparing the Base**:
Gather your wooden pearls and arrange them to form the mermaid’s body. You can have one large pearl for the head and gradually smaller pearls for the body. Thread them onto a thin rope or twine, ADD some tassel for the hair first and then put the pearl; securing each pearl with a knot beneath to keep them in place.
2. **Creating the Tassel Tail**:
Cut yarn scraps into pieces of desired length for the tail. The length of the yarn will determine the length of the mermaid’s tail. Group these yarn pieces together and tie them around the twine below the last pearl. This forms the tassel tail.
3. **Adding the Tassel Fringe**:
Continue to tie yarn scraps around the twine, moving upwards from the tail. As you progress, the tassel will start to form. Mix and match different yarn colors for a vibrant and textured look.
4. **Crafting the Arms**:
For the arms, cut smaller pieces of yarn and attach them to the sides of the mermaid’s body. Knot them in place and then comb or brush the yarn to create a smoother appearance. You can also skip that step and the doll will look beautiful as well!
5. **Designing the Face**:
Use a permanent marker to draw the mermaid face, my kids love to do this by themselves!
6. **Finishing Touches**:
Trim any excess yarn to neaten the tassels and ensure the mermaid’s body is well-proportioned. Give the tassels a final combing to prevent tangling and create a flowing look.
If you prefer a video format, checkout that small tutorial here
An easy and zero waste activity
With just a handful of materials and a touch of creativity, you’ve crafted enchanting macramé mermaid dolls that exude charm and personality. This DIY project is not only a wonderful bonding activity for you and your child but also a beautiful way to adorn your living space with handmade magic no huge macrame skills being needed!
So gather your supplies, let your imagination run wild, and dive into the art of crafting these whimsical macramé mermaids!


